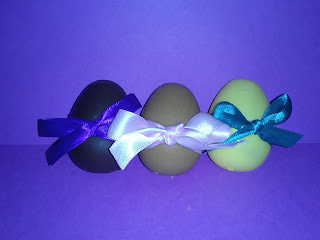
I know its late, but in my house the only time I can ready do messy arts and crafts is at night because my son is sleeping [: However, still in the spirit of Easter I made some Easter candies/decorations. It is kind of a tedious task but if you have time and patience you can do a great job at it!
These are chocolate/vanilla/peanut butter hollow eggs.
I got the idea from a cupcake book that I have where you make cupcakes that look like real eggs from melted chocolate but I did mine just a little different.
What you will need.
- Plastic egg shells
- Candy Melts
- Ribbon
- Tape (Depending on what type of eggs you buy)
I went to Target earlier this week to pick up a few items for my sons Easter basket and while I was there I found a bag of 50 hollow eggs for just $1.98, couldn't pass that up so I bought them, I figured I could do
something with them.
I made sure all of the eggs were clean and when I looked at them I realized that there were small holes in both the top and the bottom so I had to tape them off before I began.
After taping them off and making sure they were sealed I began melting down the candy melts. I prefer to use the Wilton candy melts because they seem to work the best, but make sure they are fresh and new. Once a bag of candy melts has been opened they seem to go bad, or just do not melt well a few days later. Also make sure that the bag that you have purchased is just a few days old and has not been in the cabinet for months or they will just clump together and won't melt down to a nice creamy consistency.

After melting down the candy melts I began to scoop the melted chocolate with a spoon into the eggs, filled both the top and the bottom portions of the eggs about half way full. Once they were both half way full I snapped the top and the bottom together and started to shake, the reason for shaking is to make sure that the egg shell is completely covered on the inside. Once they were completely coated on the inside, you can usually tell by looking through the egg in some light if there is a light spot then you must shake some more!, I then put them in the freezer. After about 10 minutes of being in the freezer I went and moved them around so all the chocolate would not settle on one side, I did that again 10 more minutes later and after 30 minutes in the freezer I removed them from the freezer. Once they are out of the freezer I tapped the sides lightly and twisted and was able to pull the egg apart, you must be very careful when doing this or your eggs could break. If an egg breaks you can always melt the chocolate back down and do it again.
Now that they are out of the plastic shell I put them in refrigerator to allow them to set for about 10 minutes, removed them and then tied a ribbon bow around them. My son is going to love these tomorrow, but if I can keep him out of them they will be an awesome decoration for our dinning room.
Thanks for stopping by! I would love to hear anyone's opinions and hints on how to make the process easier. Please stop by more this week for more Easter decoration ideas!


